How I used Screaming Frog to find 72 issues on my site
I ran Screaming Frog on my website expecting a clean report. Instead, I got 72 internal links with no anchor text, 22 pages with titles over 60 characters, and a canonical configuration that was quietly sending mixed signals to Google.
Screaming Frog is a website crawler that scans your site the way a search engine would. It finds broken links, missing meta tags, duplicate content, and other SEO problems. The free version crawls up to 500 URLs, which is enough for most personal sites and small businesses.
My site had been live for about two weeks. I understood the basics of SEO: how crawling works, what indexing means, why ranking matters. But understanding concepts is different from seeing what is actually happening on your own site. Screaming Frog changed that. Within thirty minutes, I had a complete picture of every technical SEO issue on my site.
This guide covers how to use the tool, what the reports mean, and how I fixed the problems it found.
Step 1: download and install Screaming Frog
Go to screamingfrog.co.uk and download the SEO Spider. It runs on Windows, macOS, and Linux.
The free version handles up to 500 URLs. For a personal blog or small business site, that is usually plenty. If you need more, the paid license costs around $259 per year.
Install it like any regular desktop application. No server setup, no configuration files. Just open the program when it finishes.
One thing worth noting: Screaming Frog is a desktop application, not a web service. All the crawling happens on your machine. Your site data does not get uploaded to any server. This matters if you are auditing client sites with sensitive content.
Step 2: configure the crawl settings
Before you start crawling, check the configuration. The default settings work for most sites, but a few tweaks can make the audit more useful.
Go to Configuration > Spider. Here are the settings I recommend for a basic SEO audit:
Crawl scope: Set to “HTML” only. You do not need to crawl images, CSS, or JavaScript files for a basic SEO audit. This speeds up the crawl significantly.
** Limits**: Set a crawl limit of 5,000 URLs for the free version. This prevents the crawler from getting stuck on infinite loops (which can happen with faceted navigation or calendar pages).
Respect robots.txt: Leave this enabled. You want to see what Google sees, and Google respects robots.txt.
If your site uses a sitemap, you can also point Screaming Frog to it under Configuration > Spider > Crawl. This helps the crawler discover pages that might not be linked from your navigation.
Step 3: crawl your website
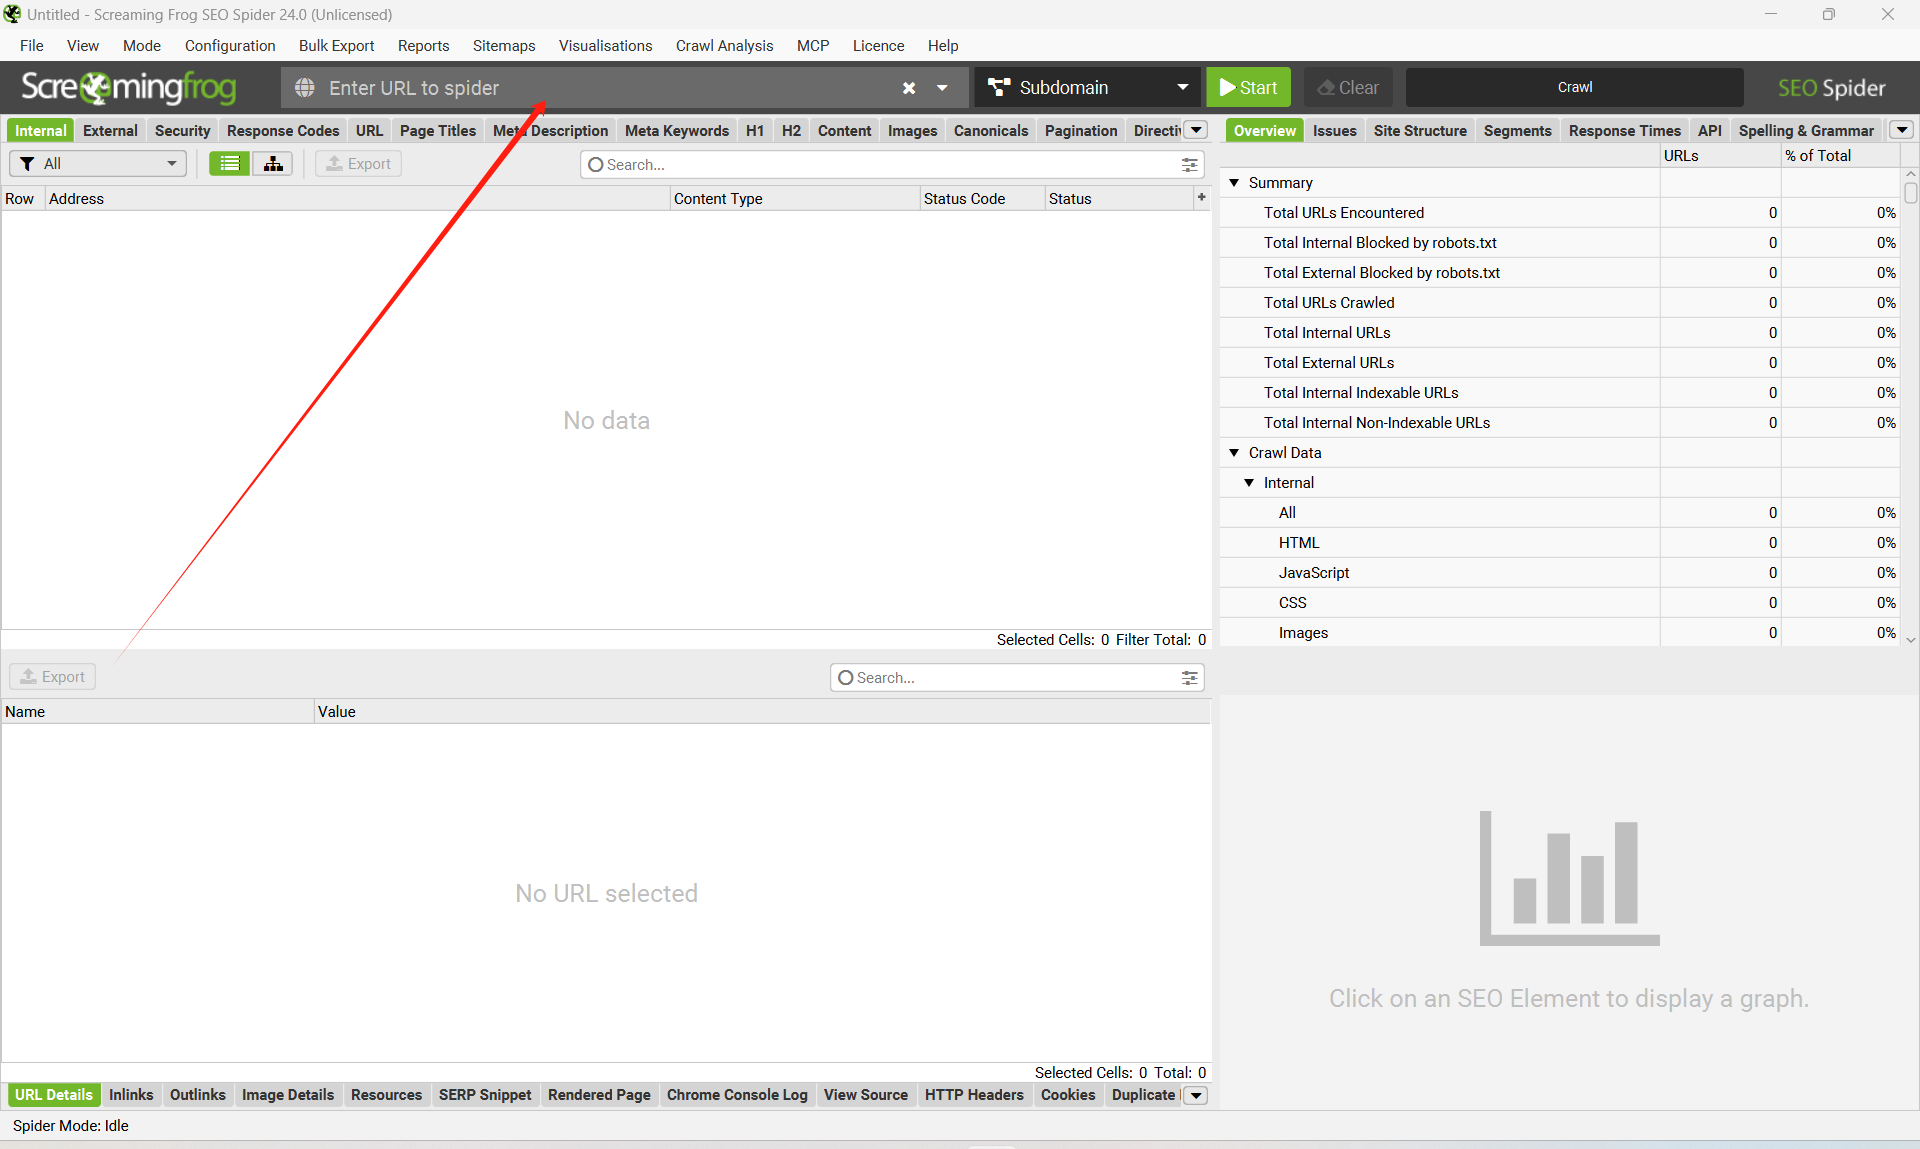
When Screaming Frog opens, you will see a simple interface with a URL bar at the top.
- Type your website URL into the bar (for example,
https://bephil.com)
- Click Start
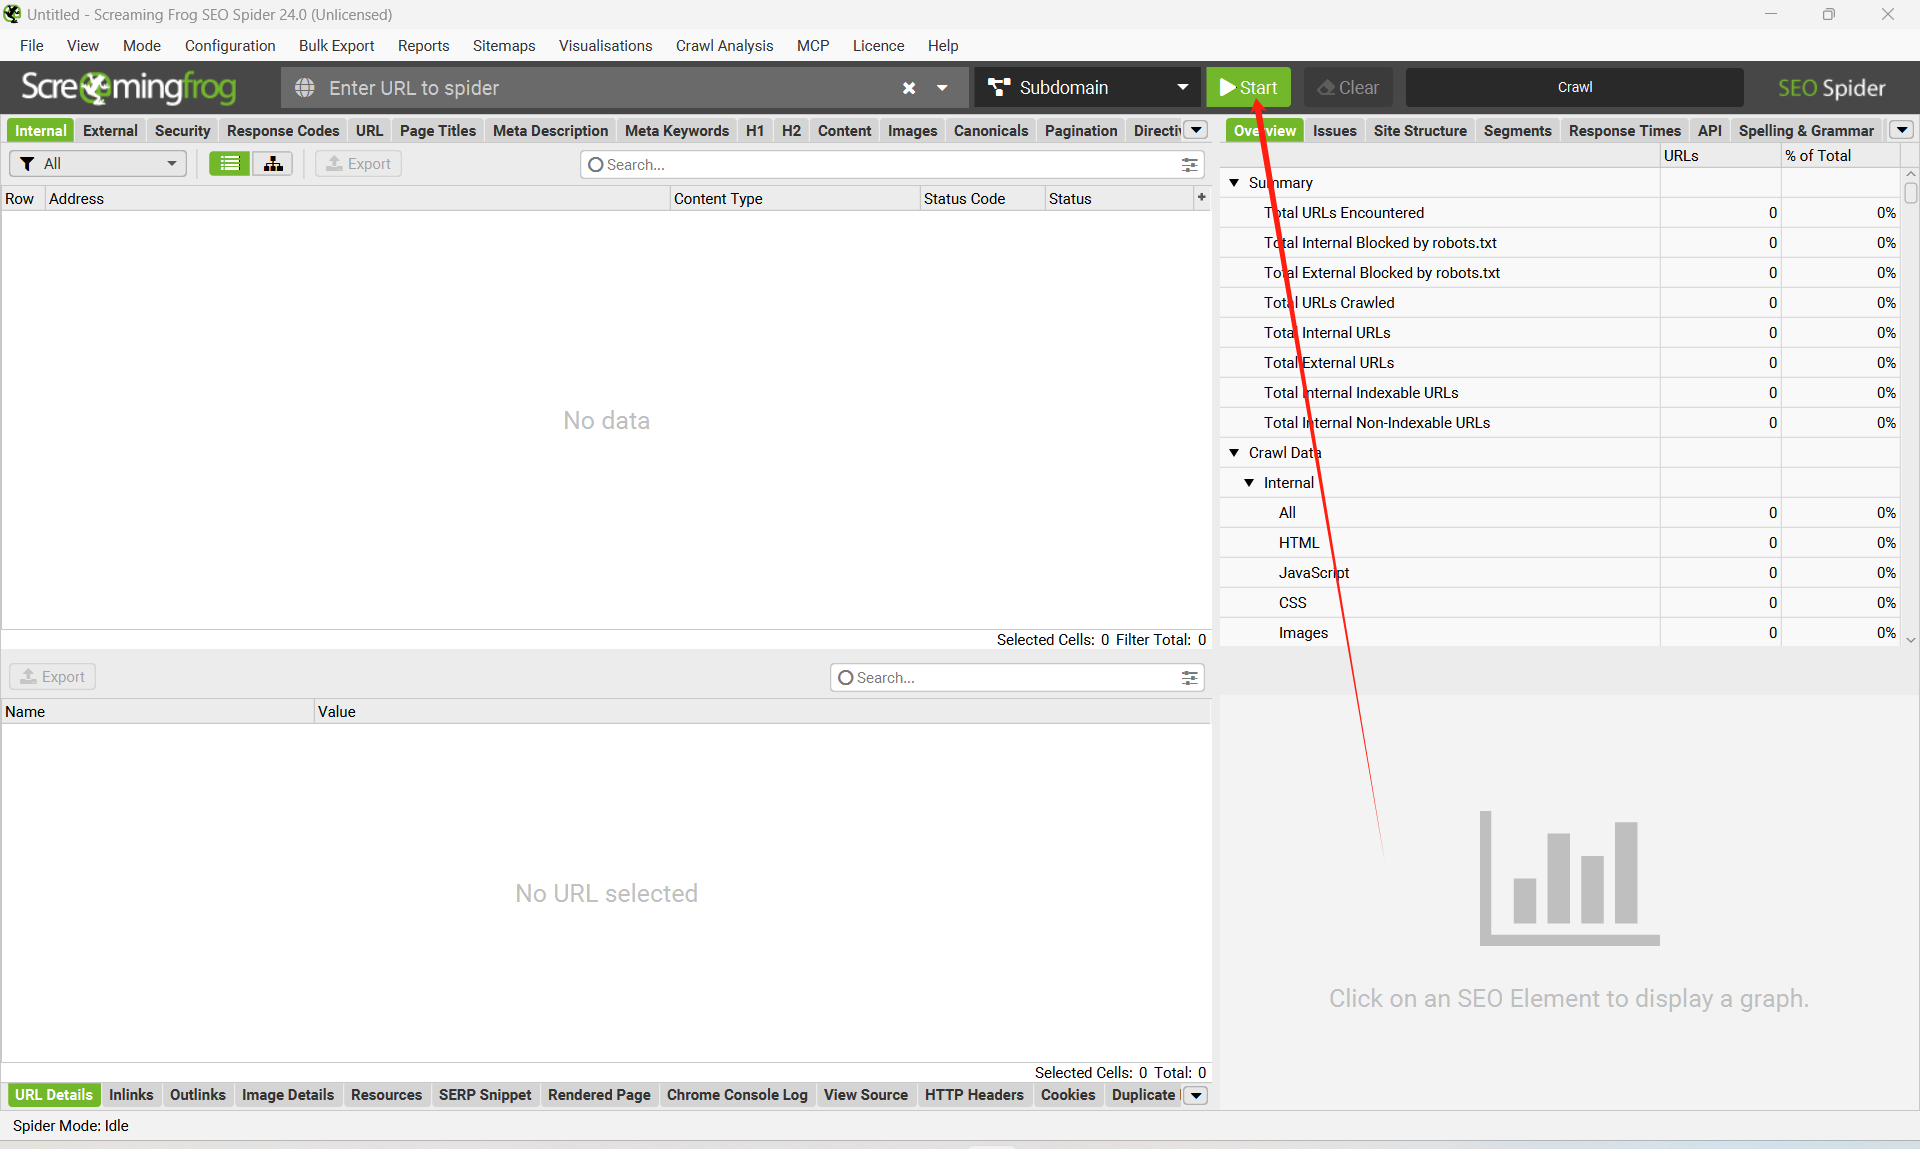
The crawler begins fetching pages. You can watch the progress in real time. For a site with under 100 pages, the crawl usually finishes in a few minutes. Larger sites take longer depending on your connection speed.
While it crawls, Screaming Frog downloads each page, reads the HTML, and stores information about every element: titles, headings, meta descriptions, images, links, response codes, and more.
You will see a progress bar at the top and a live count of URLs discovered. The crawler follows every internal link it finds, building a map of your entire site structure. This is useful for understanding how deep your content is buried. If important pages are four or five clicks from the homepage, search engines may not prioritize them.
Step 4: understand the report
When the crawl finishes, you will see a dashboard with multiple tabs across the top. Each tab shows a different category of data. The ones that matter most for SEO are:
Internal tab
Lists every page on your site. You can see the URL, status code, title, meta description, H1, word count, and crawl depth. This is your starting point for any audit.
The crawl depth column tells you how many clicks it takes to reach each page from the homepage. Pages with a depth of 1 are linked directly from the homepage. Pages with a depth of 4 or more are buried deep in your site structure.
If your most important content is buried, consider adding internal links to bring it closer to the surface. This is related to technical SEO best practices that affect how search engines crawl and index your site.
Page titles tab
Shows every page title and its character length. Google displays roughly 60 characters in search results. Titles longer than that get truncated, which can hurt click-through rates.
When I ran this on my site, 22 pages had titles over 60 characters. Some were over 90 characters. The fix was straightforward: I shortened each title while keeping the main keyword.
The pixel width column is also useful. Google’s display limit is roughly 580 pixels, and different characters take up different widths. A title with lots of W’s and M’s will truncate sooner than one with i’s and l’s.
H1 tab
Shows all H1 headings on each page. Every page should have exactly one H1. If a page has zero H1s or multiple H1s, that is a problem.
My site had one page with four H1 tags. The issue was that the blog layout renders the frontmatter title as an H1, and the markdown content also contained H1 headings. This is a common mistake when you use a CMS or static site generator that automatically adds an H1 from the title field.
If you are using Astro or a similar framework, check your layout templates. The H1 should come from the layout, not from the markdown content.
Canonicals tab
Shows the canonical URL for each page. Canonicals tell Google which version of a page is the “real” one. If you have both www and non-www versions of your site, the canonical should point to one consistent version.
My site had a problem here. All pages on www.bephil.com had canonicals pointing to https://bephil.com (non-www). This is technically correct if you want Google to index the non-www version, but Screaming Frog flags it because the www version becomes “non-indexable.”
The fix was adding a 301 redirect from www to non-www in Cloudflare. This way, visitors and crawlers always end up on the correct version.
Response codes tab
Shows HTTP status codes for every URL. Look for:
- 404 errors (page not found)
- 301 redirects (permanent redirect)
- 500 errors (server error)
I had two 404 errors pointing to Cloudflare’s email protection script, which is a known issue with Cloudflare’s email obfuscation feature. These were not real problems, but they cluttered the report.
If you see 404 errors on pages that used to exist, check if other sites are linking to those URLs. If so, you should either recreate the page or set up a redirect.
Images tab
Shows every image on your site, its alt text, file size, and whether it uses lazy loading. Large images slow down your site, which affects both user experience and search rankings.
I recommend checking the Core Web Vitals after running a Screaming Frog audit. Page speed and technical SEO are closely related.
Step 5: export the data
Screaming Frog lets you export any tab to Excel or CSV. This is useful for tracking fixes over time or sharing findings with a team.
To export:
- Click on the tab you want to export
- Click the Export button in the top right
- Choose your format (Excel or CSV)
- Save the file
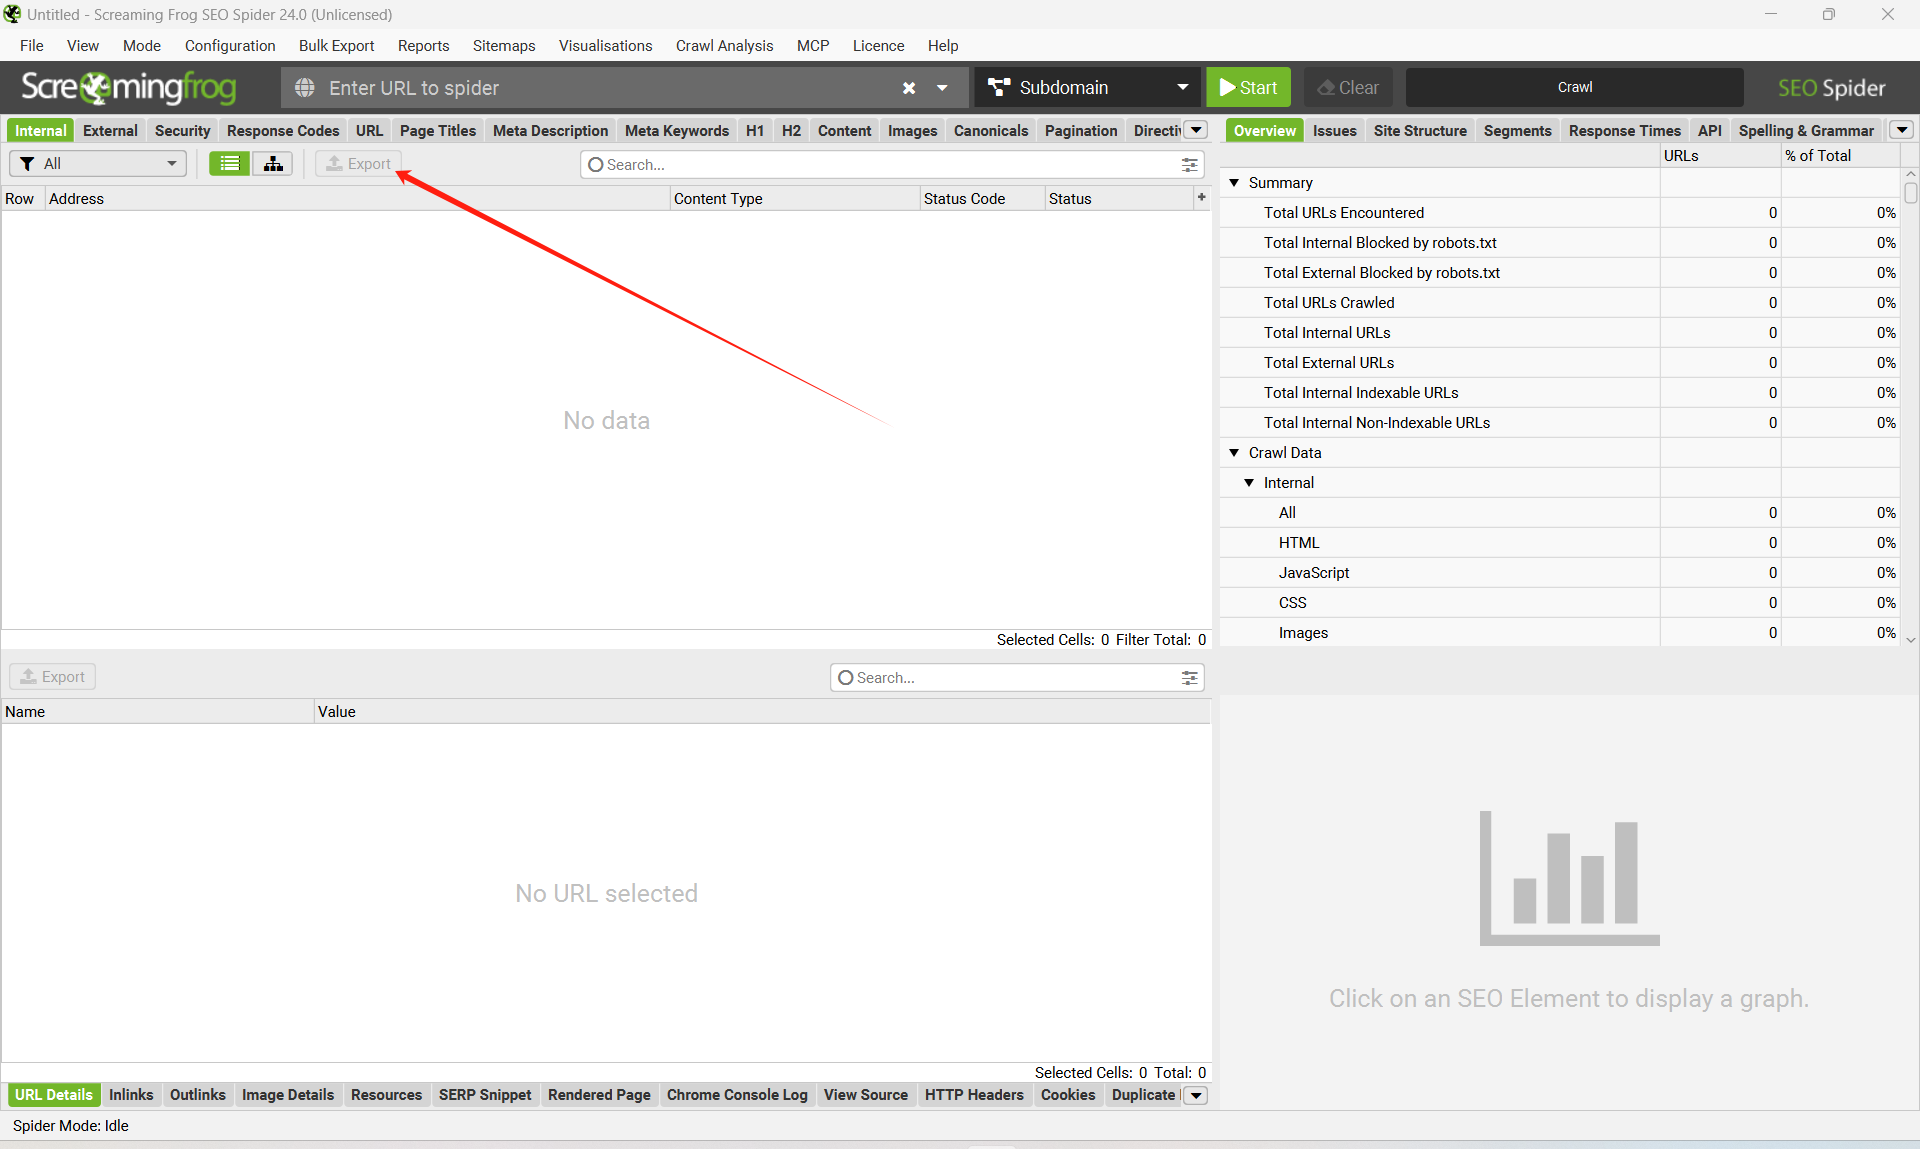
I exported the page titles, H1, and canonicals tabs as separate Excel files. This made it easy to sort the data and identify which pages needed attention first.
Exporting is also useful for client work. If you are doing SEO consulting, you can send the exported files to your client as part of the audit deliverable. They get a clear record of what was found and what needs fixing.
Step 6: prioritize the fixes
Not all SEO issues are equally important. Here is how I think about priority:
High priority
Fix these immediately. They directly affect how Google indexes your site.
- Canonical mismatches (www vs non-www)
- Missing or duplicate H1 tags
- 404 errors on pages with inbound links
- Pages blocked by robots.txt that should be indexed
These issues can prevent your pages from being indexed at all. If Google cannot figure out which version of a page to index, or if it cannot find the page because of a broken link, your content will not appear in search results.
Medium priority
Fix these soon. They affect search visibility and user experience.
- Titles over 60 characters
- Missing meta descriptions
- Images without alt text
- Internal links without anchor text
These issues do not prevent indexing, but they can hurt your rankings and click-through rates. A truncated title in search results looks unprofessional and may cause users to skip your listing.
Low priority
Fix these when you have time. They are good hygiene but not urgent.
- Title pixel width over 561 pixels
- Minor redirect chains
- Mixed content warnings
These are polish items. They will not make or break your SEO, but fixing them shows attention to detail.
In my audit, the canonical issue was high priority. The 22 long titles were medium priority. The 72 internal links without anchor text were low priority since most were navigation links.
Real example: what my audit found
Here is a summary of what Screaming Frog found when I crawled bephil.com:
| Issue | Count | Priority |
|---|---|---|
| Pages with titles over 60 characters | 22 | Medium |
| Internal links without anchor text | 72 | Low |
| Pages blocked by robots.txt | 12 | Low |
| Pages with multiple H1 tags | 1 | High |
| 404 errors | 2 | High |
| Pages with title pixel width over 561px | 20 | Medium |
| Canonical pointing to different domain version | 36 | High |
The canonical issue was the most impactful. My site was configured to use bephil.com (non-www), but there was no redirect from www.bephil.com to the non-www version. This meant Google was seeing two versions of every page. I fixed it by adding a 301 redirect in Cloudflare.
The H1 issue was on my Claude Code installation guide. The frontmatter title was rendered as an H1 by the layout, and the markdown also contained # Windows Installation and # macOS Installation headings. I changed those to ## headings.
The 22 long titles were the easiest fix. I went through each one and shortened it while keeping the main keyword. Some titles were cut by 20 or 30 characters. The search results now show complete titles instead of truncated ones.
Common mistakes when using Screaming Frog
After running several audits, I noticed a few patterns that trip people up.
Ignoring the crawl depth
Many people focus only on errors and warnings. But the crawl depth column tells you something important about your site structure. If your best content is buried four or five clicks deep, search engines may not prioritize it.
Not exporting regularly
The export feature is useful for tracking progress over time. If you fix 10 issues this month, you can compare the next crawl to see if new problems appeared.
Over-optimizing low-priority issues
It is tempting to fix everything at once. But if you spend three hours fixing 72 navigation links with no anchor text, you are wasting time. Focus on the high and medium priority issues first.
Forgetting to re-crawl after fixes
After you fix issues, run Screaming Frog again. This confirms the fixes worked and helps you catch any new problems that appeared.
Running the audit regularly
I run Screaming Frog on my site once a month. It takes about ten minutes and usually surfaces something I missed.
The tool does not fix problems for you. It finds them. You still need to understand what the reports mean and decide what to do. But compared to manually checking every page, it saves hours of work.
If you understand the basics of SEO but have not done a technical audit before, start with the free version. Crawl your site, export the results, and spend an afternoon fixing the high-priority issues. You will learn more about your site in that one afternoon than in a week of reading tutorials.
Next steps
- Technical SEO Audit Checklist for AI Readiness - A broader audit checklist covering AI search optimization
- Core Web Vitals for AI SEO Guide - How page speed affects your search rankings
- GEO SEO: Optimize for AI Search - Optimize your content for AI-powered search engines like ChatGPT and Perplexity